Lesson 13: Publishing a Macromedia Flash Movie
Upon completion of this unit, you should be able to:
- Make Flash content assessible.
- Add named anchors for browser navigation capabilities .
- Publish a Flash movie for a Web site .
The Gallery San Luis Web Site Progress
When you started designing the Gallery San Luis Web site in Lesson 4, you outlined the list of items the client wanted incorporated into the site. You have now finished all the sections of the Gallery San Luis project :
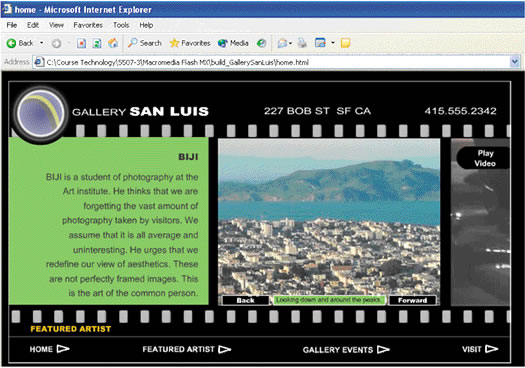
- A Home page that is both appealing and speaks photography.
- A Featured Artist page with a slide show of photographs and featured photographer information (and perhaps video interviews with the featured artists).
- An animated Map page to indicate where the gallery is located.
- An Events page for requesting tickets to gallery events.
- An animated Map page to indicate where the gallery is located.
- Sound incorporated on buttons.
- Slick transitions between pages.
- An overall photography metaphor for the site.
What remains to be done is the final work to fine-tune this site. We will make this site accessible to users with a variety of disabilities. We will add named anchors to enhance browser functionality, and we will publish the Flash site that we have created.
 Creating Assessibility Creating Assessibility
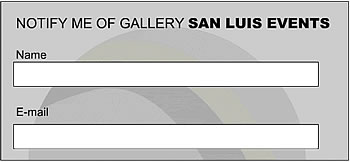
Assessibility refers to making Web content that is usable for people with visual, auditory, and other disabilities. For example, you can make images that people can read by using screenreader software that reads aloud the content of a page. A screen reader, for example, would take the portion of the Events section shown in Figure 13-1 and read it to the user as "Notify me of Gallery San Luis events. Text Field, Name."
FIGURE 13-1a:
Sample form to be read by a screen reader
This section focuses on making the Macromedia Flash site work with a screen reader.
By default, the following items are accessible in Flash: text, buttons, and movie clips. This means all static, input, and dynamic text boxes will be read in their entirety, and the instance names of movie clips and button instances will be read by the screen reader. However, certain components and arrangements can be difficult for a screen reader to deal with. The following exercises help you find those difficult areas and change them appropriately, making the site as positive an experience as possible for everyone.
Adding Accessibility to a Site
Although it is best to design your site for accessibility in the beginning and add accessibility labels as you build, it is not too late to fine-tune the Gallery San Luis site for accessibility. Before dealing with areas of the site individually, you can configure the entire site for accessibility on the Accessibility panel.
-
STEP-BY-STEP 13.1: Adding Overall Accessibility to Site
- Start Flash and open the home.fla file you worked with in Lesson 12 (or Lesson 11, if you have not completed the optional exercises in Lesson 12).
Note:
If you had problems with the Lesson 12 exercises, ask your instructor for the home8video.fla sample solution file. If you did not complete Lesson 12 and you had problems with Lesson 11, ask your instructor for the home8.fla sample solution
file. Once you open the file supplied by your instructor, save it as home.fla in your build GallerySanLuis folder and proceed with this lesson.
- Open the Edit menu, and click Deselect All if it is available. (If it is not available, it means nothing is selected.) The entire movie is now the object of the Accessibility panel.
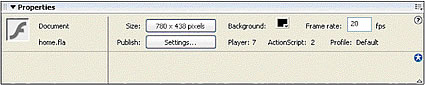
- On the Property inspector, click the Edit accessibility settings button (the star in the lower right-hand corner of the property inspector, as shown in Figure 13-1b.)
FIGURE 13-1b:
The Edit accessibility settings button
- In the Accessibility dialog box, check the check boxes described below:
Make Movie Accessible: Exposes the movie to screen readers. The screen reader can read all static text, input text, and dynamic text fields. Buttons and movie clips will be read according to their instance names.
Make child objects accessible: Exposes all sub-movies (such as the Fstrip movies and the Map movie) to the screen reader.
Auto label: Automatically labels buttons with the text that appears inside them.
- Key Gallery San Luis Web Site in the Name box. (When creating your own Web site names, be sure the name you choose is simple and informative.)
- In the Description box, key Gallery San Luis is a photography gallery located in San Francisco. It specializes in student and experimental work. A screen reader will read this description after reading the title of the page.
- Save the document and remain in this screen for the next Step-by-Step.
Removing Confusing Text from Accessibility
A screen reader can now read all the text boxes in the Home section plus the buttons at the bottom. However, screen readers typically read a page in columns; thus the phone number in the upper-right corner will be read toward the end of the page, potentially confusing a user with a screen reader. You can fix this by changing the Read options on the Accessibility panel for that particular object.
-
STEP-BY-STEP 13.2 Deactivating Disruptive Text
- Use the Selection tool to select the phone number in the upper-right corner of the screen.
- Click the Modify menu, and click Convert to Symbol. The text must be a symbol to control its accessibility options. Otherwise, the text is automatically read.
- Name the symbol phone and make it a movie clip symbol. Then click OK.
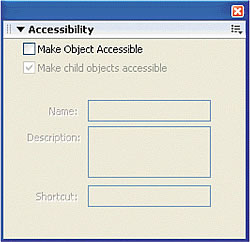
- On the Accessibility panel, deselect Make Object Accessible, as shown in Figure 13-2. (If the Accessibility panel is not already open, click its button on the Property inspector.) This single object is now not accessible; the rest of the site remains accessible.
FIGURE 13-2:
Object made inaccessible
To ensure that the phone number can still be read by a screen reader, you can type it into the overall document description.
- Click in a blank area away from the Stage to deselect everything.
- In the Description box of the Accessibility panel, edit the text as follows:
Gallery San Luis is a photography gallery located in San Francisco. The phone number is 415-555-2342. The Gallery specializes in student and experimental work.
- Save the document and remain in this screen for the next Step-by-Step.
Removing "Noise" from an Object
The Visit section could be rather confusing for someone using a screen reader. Because you selected Make Child Objects Accessible, the map instance will actually recite "Alcatraz, Treasure Island" and all the other objects named on the map. Because this is not information the user needs at that particular moment, this is referred to as a "noisy" object. To avoid this confusion, you can suppress the child objects just for the Map movie clip and give it a general description.
-
STEP-BY-STEP 13.3: Fixing a "Noisy" Object
- Click frame 30 of the Visit layer.
- Double-click the Fstrip Visit movie clip instance to enter symbol-editing mode.
- Select the Map movie clip instance in the center cel.
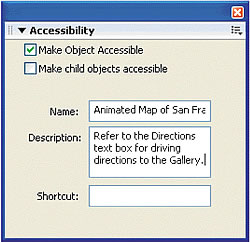
- On the Accessibility panel, select Make Object Accessible and then make sure Make child objects accessible is not selected. Now the screen reader will ignore the labels on the map.
- In the name box, key Animated Map of San Francisco.
- In the Description box, key the following, as shown in Figure 13-3:
Map moves with directions selected. Refer to the Directions text box for driving directions to the Gallery.
FIGURE 13-3:
Map accessibility settings
- Close the Accessibility dialog box, save the document, and remain in this screen for the next Step-by-Step.
Hot Tip:
To make a site accessible while you're building it, the best plan is to add accessibility comments to every image you use.
Adding Named Anchors for Enhance Browser Functionality
As the design currently stands, a browser would read the entire Gallery San Luis site as one page, even though it has four sections to it, as shown in Figure 13-4a. Thus users could not use the browser's bookmark (Favorites) features for specific sections (such as the Visit section) and could not use the browser's Forward and Back buttons.
The Back button cannot be used to return to the Home Section from the Featured
FIGURE 13-4a:
Browser sees site as one page
Some of the problems this presents are:
- Favorites can mark only one page for the entire site.
- The Back button is not activated to return to the Home section from the Featured Artist section.
To correct this, Flash has a named anchor feature you can use to mark frames on the Timeline as navigation and bookmarking points of reference. You create named anchors on the Property inspector. You must, however, label the frame before naming the anchor.
-
STEP-BY-STEP 13.4: Creating Named Anchors
- Click Scene 1 on the Information bar. You return to the main Timeline.
- Select frame 10 of the Actions & Labels layer. There is a stop action in this frame, indicated by an "a" on the Timeline.
- On the Property inspector, key Home in the Frame Label text box and select Anchor as the Label Type, as shown in Figure 13-4b.
FIGURE 13-4b:
Labeling a named anchor
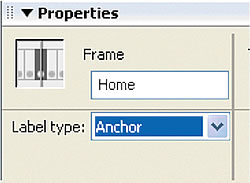
- Add named anchors to the following frames on the Actions & Labels layer:
Frame 20: Artist
Frame 30: Visit
Frame 40: Events
Note:
You have to configure the publish settings before you can test the named anchors. This will be done in the next Step-by-Step.
- Save the document and remain in this screen for the next Step-by-Step.
Publishing in Flash
Gallery San Luis is Flash content designed to be a Web site. Web sites are viewed through browsers that require HTML, which opens Flash documents by using the Macromedia Flash Player. Flash can create the HTML page for you automatically through the Publish Settings dialog box. In fact, every time you select the Publish Preview and Default commands on the File menu, you create an HTML page to hold your Flash file (SWF).
Note: The Publish command creates a SWF file and an HTML file based on the FLA file. Notice that an additional tab appears when you click HTML.
You might have noticed that the Gallery site displays in the upper-left portion of the Web page when you publish it, as shown in Figure'13-7. In the Publish Settings dialog box, you can configure the HTML page to expand the site in the browser window and activate the named anchors.
FIGURE 13-5a:
Site stuck in corner of the browser
-
STEP-BY-STEP 13.5: Configuring the Publish Settings
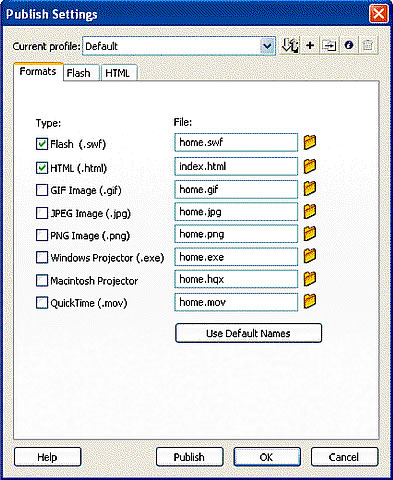
- On the File menu, click Publish Settings to open the Publish Settings dialog box. Make sure the Flash and HTML check boxes on the Formats tab are selected. Make sure the filename for the HTML file is index.html. The dialog box should look like Figure 13-8.
Note: The default name for a home page in most browsers is index.html. The Web Design Skills special feature at the end of this lesson discusses other file types you can create from a FLA file.
FIGURE 13-5b:
Initial publish settings
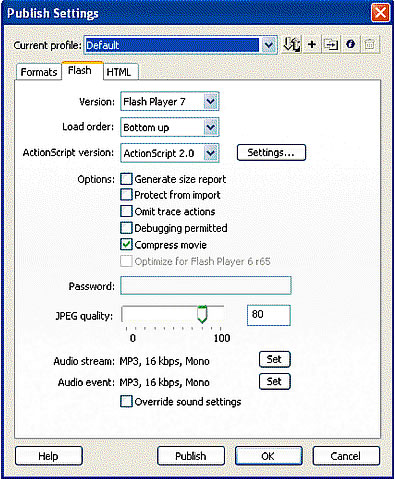
- Click the Flash tab at the top of the dialog box. Set the version to Flash Player 8. (The HTML generated by Flash contains scripting to automatically route users to the Macromedia Flash Player download page if they don't have the latest version.) Confirm that ActionScript setting is ActionScript 2.0. Confirm that JPEG quality is set to 80.
Note:
The quality setting of 80 is a nice balance between quality and size of JPEG files. You might want to play with increasing and decreasing this number and noting the resulting file size and quality changes.
- Confirm that the sound is set to MP3, 16 kbps, Mono. See Figure 13-5c for reference. (Again you might want to increase or decrease the sound quality and check out the resulting file size. You don't have any Audio Stream in the Gallery San Luis site. All the sounds are Event sounds, which means they play independently of the Timeline.)
FIGURE 13-5c:
Flash publish settings
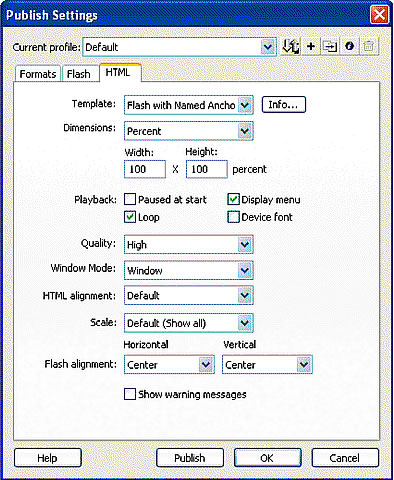
- Click the HTML tab. Change the Template to Flash with Named Anchors. (This configures the HTML to note the named anchors you inserted for each section.) Select Percent from the Dimensions list box and confirm that the Width and Height are both 100 (the movie will automatically resize to fill the browser window). Set the Flash alignment to Center for both Horizontal and Vertical. When you finish, the dialog box should look like Figure 13-10. Click OK.
Note:
Because you configured the movie for 800 x 600 or
1024 x 768 resolution monitors, using percentage dimensions will work well. If the movie dimensions vary greatly from the resolution settings, the percentage dimensions can cut off part of your movie.
FIGURE 13-5d:
HTML publishing settings
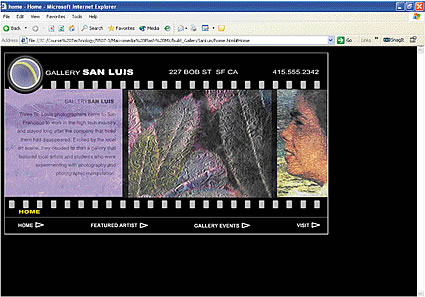
- On the File menu, point to Publish Preview, and then click Default - (HTML).
- View the site in your browser (your browser window will open automatically). The site fills the screen, as shown in Figure 13-5e.
FIGURE 13-5e:
Gallery San Luis published to 100% of the screen
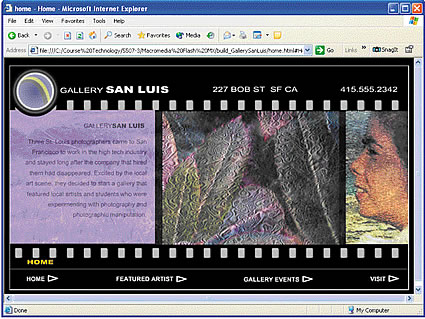
- Shrink or expand the browser window and notice that the site shrinks or expands with it.
- Test the buttons, form, and animated Visit page. Notice that you can use the browser's Forward and Back buttons and bookmark features.
- Click the View menu, and then click Source. Note the HTML that directs users to www.macromedia. com/go/getflashplayer if they don't have the correct Flash Player version.
- Close the source document and the browser. Return to Flash and save the document.
- Navigate to the build Gallery5anLuis folder and note the file sizes of the HTML, SWF, and FLA files, as shown in Figure 13-12.
FIGURE 13-5f:
File sizes for HTML, SWF, and FLA files

Note: You would post the HTML and SWF files to the Internet to create the site. The FLA files remain local. You would also post the images folder (and any movies or other files loaded into the site) to the Internet because some photos are being dynamically pulled from that folder. In general, concentrating all pages on the Web site in one Flash document means you have significantly fewer files in your site folder.
- Switch back to Flash, close the document, and exit Flash.
 Back to previous page: Lesson 12: Video in Macromedia Flash Back to previous page: Lesson 12: Video in Macromedia Flash
 After this lesson, you should complete the following After this lesson, you should complete the following
- Test on Flash Lesson 13: Publishing a Flash Movie
- Project 15: Flash Game
|
