Lesson 5: Adding Text and Navigation
Upon completion of this unit, you should be able to:
- Create and configure text.
- Line up objects with another layer.
- Create a transparent overlay image.
- Create navigation buttons.
- Create Layer folders.
- Insert Macromedia Flash movies (documents with swf extensions).
Before you begin: If you had problems with the previous lesson, ask your instructor
for the home1.fla sample solution file. Once you open this file, save it as home.fla followed by your initials in the main build_GallerySanLuis folder (overwriting the file with which you had problems.) In this way you will start this lesson with a "perfect" copy of the work so far.
Note: If the Missing Font warning box appears when you open homel.fla or any other file, click Use Default to close the box.
The Gallery San Luis Web Site Progress
When you started designing the Gallery San Luis Web site in Lesson 4, you outlined the list of items the client wanted incorporated into the site. Let's take a quick look at how the Gallery San Luis project has progressed:
- A Home page that is both appealing and speaks photography.
- A Featured Artist page with a slide show of photographs and featured photographer information (and perhaps video interviews with the featured artists).
- An Events page for requesting tickets to gallery events.
- An animated Map page to indicate where the gallery is located.
- Sound incorporated on buttons.
- Slick transitions between pages.
An overall photography metaphor for the site.
 Working with Text Working with Text
You start this lesson by adding text to the home page. The text description on the home page has two elements: a title and descriptive text. To give you the most flexibility in layout, you can create two separate text objects and align them separately to match the comp image on the Gallery Text layer.
You use the Text tool to create text in Macromedia Flash MX 2004. Here are some keys to working successfully with the Text tool:
- Click once on the Stage to create a text box.
- To size the text box, always drag the handle in the corner (don't use the width and height settings on the Property inspector or Transform panel).
- To increase the lettering size, use the Font Size box on the Property inspector.
- Click the Selection tool after you finish typing in a text box. If you don't, the Text tool is still active, and you will create a new text box if you click on the Stage again.
-
STEP-BY-STEP 5.1: Creating Text
- Launch Flash.
- Open your home.fla movie, which should be in the build_GallerySanLuis folder you created in Lesson 4.
- Click the Insert Layer button. Rename the new layer Gallery Text.
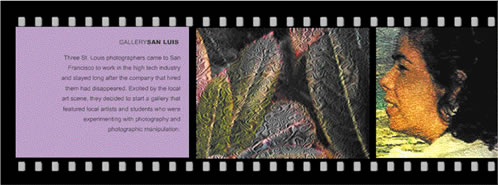
- Click the Show Outline button for the Left layer (the Background layer should already be in Outline view). The purple background disappears, revealing the comp image, as shown in Figure 5-1.
As your list of layers grows'' you might need to expand the Timeline panel to make all of these visible.
FIGURE 5-1a:
Showing a layer as an outline
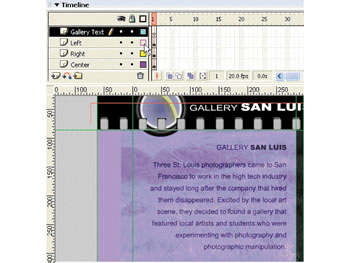
- Select the Text tool.
- Click and drag to create a text box on top of the title GALLERY SAN LUIS (this text is inside the left cell over the purple background and is visible from the Comp Image layer - not the header in white text on the black background).
- On the Property inspector, set the text type to Static, the font to Arial or Helvetica, the size to 12 points, the color to black (#000000), and the alignment to right-aligned.
- Key GALLERY in all caps.
- On the Property inspector, change the font to Arial Black. If you don't have Arial Black, select Helvetica and select Bold.
- Key SAN LUIS in all caps.
- Select the Selection tool. The text is surrounded by a blue outline.
- Use the Arrow keys to position the new text, GALLERYSANLUIS, over the same text in the Comp Image layer.
- Click outside the text box to deselect it.
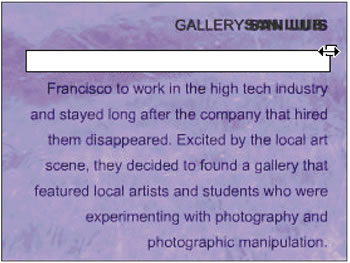
- Select the Text tool, and click on the left edge of the top line of the paragraph text (visible from the Comp Image layer) to start a new text box, as shown in Figure 5-1b.
FIGURE 5-1b:
Inserting a new text box

- Drag the text box size handle and extend the text box to the right border of the background, as shown in Figure 5-1c. (Note: You don't always have to size a text box, but it is helpful when creating a text box that will have more than one line, because it creates an automatic return when the border of the box is reached-similar to word-wrapping in a word-processing program.)
FIGURE 5-1c: Resizing a text box
- On the Property inspector, set the font and font size to Arial or Helvetica, 12, and set the alignment to right-aligned.
- Key the following in the text box:
Three St. Louis photographers came to San Francisco to work in the high tech industry and stayed long after the company that hired them had disappeared. Excited by the local art scene, they decided to start a gallery that featured local artists and students who were experimenting with photography and photographic manipulation.
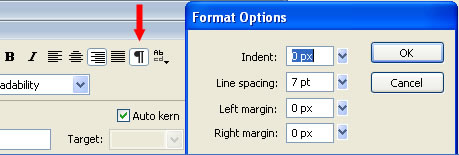
- Click the Edit Format Options button on the Property inspector (the button has the paragraph symbol { ¶ } on it - see figure 5-1d below). Change the Line spacing to 7 points.
FIGURE 5-1d: Edit Format Options button on the Property Inspector
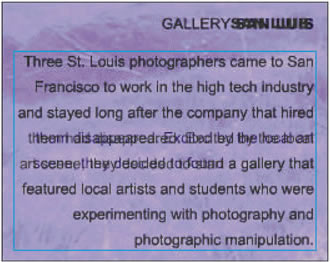
- Use the Selection tool to select the text box and align it with the text in the Comp Image layer, as shown in Figure 5-1e. If the body text is not lining up correctly, make sure the text box is wide enough that you can read "photographic manipulation" on the bottom line. You can also click the Format button on the Property inspector and change the line spacing. Try 7 pt. If you need to widen the text box, double-click the box and drag the resize handle in the upper-right corner. Do not stretch the box with the Transform tool or change its dimensions in the Property inspector (this just stretches the text).
Important: Sometimes text displays in differentent sizes in Windows and Macintosh browsers (text might display too large on Windows browsers to fit inside text boxes). If you develop on a Macintosh computer, check your text displays on a Windows computer before publishing to the Web. One' way to avoid text size changes is to convert the text from a text object to a vector graphic object. You can do this by breaking apart the text into individual letters (use the Break Apart command on the Modify menu). However, once you break apart text, it is no longer selectable for edits with the Text tool.
Note:
You might not be able to get your text to match up exactly. As long as the text comes close to filling the same area and is within the left box, it will be fine in the end.
FIGURE 5-1e: Aligning the text to the comp image
- Save the document and preview it by clicking the Control menu, and then Test Movie. The preview should look like that shown in Figure 5-5. The text should fill the left cel of the home filmstrip.
- Click the File menu and then click Close to close the preview window. Remain in this screen for the next Step-by-Step.
FIGURE 5-5: Previewing the aligned text
Creating a Transparent Overlay Image
Although you have created the title, text, and purple background box, you have not yet created the texture. One way to create a texture is to use a semitransparent overlay image. This image is placed on top of the page like a clear, textured cover. Separating the texture from the text box background gives you more flexibility for designing and modifying it.
-
STEP-BY-STEP 5.2: Creating a Transparent Overlay Image
- Click in the Gallery Text layer, and then click the Insert Layer button.
- Rename the new layer Overlay.
- Open the File menu, point to Import, and click Import to Stage to open the Import dialog box.
- Navigate to the images folder in your build_GallerySanLuis folder, select overlay.jpg, and click Open (Windows) or Import (Macintosh). The Overlay image appears on the Stage in the Overlay layer. You might have to zoom out to see the entire image.
- Click the Modify menu, and then click Convert to Symbol.
- In the Convert to Symbol dialog box, select Movie clip. Name it Overlay Image and click OK.
- On the Property inspector, choose Advanced from the Color drop-down menu. Then click Settings. The Advanced Effect dialog box opens, as shown in Figure 5-2a.
FIGURE 5-2a: Advanced Effect dialog box
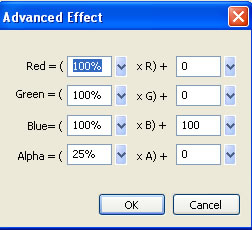
- Set the left Alpha box to 25% and set the right Blue box to 100. Then click OK.
- On the Property inspector, position the overlay on the Stage by entering -20 in the X location coordinate, and 88 in the Y location coordinate.
Hot Tip: The controls on the left side of the Advanced Effect dialog box let you reduce the color or transparency values by a specified percentage. The controls on the right let you reduce or increase the color or transparency values by a constant value.
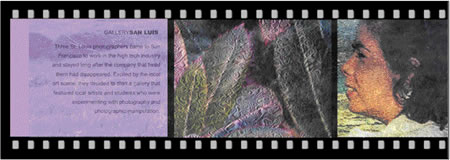
- Click the Control menu, and then Test Movie. The movie should play with the transparent overlay, as shown in Figure 5-2b below. (Although the images seem to run over the edge, they will automatically be cut by the Stage when you publish the final movie.)
- Close the Preview window and save your document. Remain in this screen for the next Step-by-Step.
FIGURE 5-2b: Preview with overlay and text
Building the Navigation Area
The filmstrip area of the site is now complete. You're ready to add the navigation layer at the bottom of the Stage with the page title and buttons for navigating to different areas of the site, including Home, Featured Artist, Gallery Events, and Visit. The text in the navigation area is designed to look like a filmstrip. If you've ever looked at a photographic negative, you might have noticed that the text and numbers on a filmstrip are long and flat. You can create similarlooking text by using the Transform panel.
-
STEP-BY-STEP 5.3: Creating Elongated Text
- Click in the Overlay layer, and click the Insert Layer button.
- Rename the new layer Page Name.
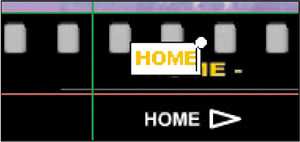
- Select the Text tool and click on top of the orange HOME (visible from the Comp Image layer).
- Set the following attributes on the Property inspector: Arial Black or Helvetica Bold, 12, and orange color #FFCC00.
- Key HOME in all caps, as shown in Figure 5-8.
FIGURE 5-3a: Creating page title text
- Select the Selection tool. The text is surrounded by a blue border showing that it is selected. If it is not, click the first frame of the Page Name layer.
- Click the Modify menu, and click Convert to Symbol to open the Convert to Symbol dialog box.
- Choose Graphic, name it Title Home, and then click OK.
- Make sure the Title Home instance is still selected and select the Transform tab of the Align & Info & Transform panel. (If there is noo Transform tab, open the Window menu, and then click Transform.
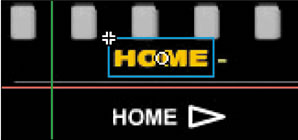
- On the Transform panel, uncheck the Constrain check box. Double-click in the Horizontal Scale Width box (on the left), key 130, and press Enter (Windows) or Return (Macintosh) as shown in Figure 5-3b.
FIGURE 5-3b: Text stretched to 130%

- Use the Selection tool or the arrow keys to line up HOME directly above the HOME label visible from the Comp Image layer, as shown in Figure 5-3c.
FIGURE 5-3c:
The title Home graphic aligned
- Save and preview the document. Close the Preview window and remain in this screen for the next Step-by-Step.
Creating the Navigation Buttons
Buttons are similar to movie clip symbols, with independent Timelines containing four frames. When you select the Button behavior for a symbol, Flash creates the Timeline and the four frames. The first three frames display the button's three possible states, and the fourth frame defines the active area of the button. The Timeline doesn't play; it reacts to pointer movement and actions by jumping to the appropriate frame.
Each frame on the Timeline of a button symbol has a specific function:
- Frame 1: The Up state, representing the button's appearance whenever the pointer is not over the button.
- Frame 2: The Over state, representing the button's appearance when the pointer is over it.
- Frame 3: The Down state, representing the button's appearance as it is clicked.
- Frame 4: The Hit state, defining the area that responds to the mouse click. This area is invisible in the movie.
-
STEP-BY-STEP 5.4 Creating Navigational Buttons
- Click the Page Name layer. Click the Insert Layer button, and rename the new layer Navigation.
- Select the Line tool. In the Tools section of the toolbar, change the Stroke color to dark gray (#666666).
- Click just below and to the left of the page name (below the word Home that you just placed) and drag to create a line over the gray line visible from the Comp Image layer, as shown in Figure 5-11. To draw a straight line, hold down the Shift key as you drag.
FIGURE 5-11:
Creating a dividing line

- Use the Selection tool to select the line. On the Property inspector, set the line's X value to -20.
- Click the Modify menu, and click Convert to Symbol to open the Convert to Symbol dialog box.
- Name the symbol Navigation Divider, select the Graphic behavior, and click OK.
- Select the Text tool.
- Set the keyboard to Caps Lock. On the Property inspector, set the following text attributes: Arial, 12, Bold, and white (#FFFFFF).
- While still in the Navigation layer, click the Stage below the orange Home title and key HOME (near the white Home text visible from the Comp Image layer).
Hot Tip:
When you have several text items to create and then place-all with the same properties - you might find it easier to enter all your text items first and then switch to the Selection tool for placement of the text boxes.
- Use the Selection tool (and arrow keys) to align the HOME text on top of the text from the Comp Image layer.
- Use the Text tool again and key FEATURED ARTIST. Align it to its text from the Comp Image layer.
- Add additional text objects for GALLERY EVENTS and VISIT, and align them appropriately, as shown in Figure 5-12.
FIGURE 5-12 Creating button labels

- Use the Selection tool to select all four text boxes, and then select Align Top Edge in the Align panel. (Be sure To Stage is off)
- Save your changes and remain in this screen for the next Step-by-Step.
Applying Symbols to the Navigation Buttons
To make the navigation text look more like a set of buttons, you will insert arrow symbols next to each navigation label.
-
STEP-BY-STEP 5.5 : Creating Button Symbols
- With the Navigation layer still selected, open the File menu, point to Import, click Import to Library, and select navArrow.swf from the images folder in your build_GallerySanLuis folder. Click Open (Windows) or Import (Macintosh). The navArrow symbol displays in the library as a graphic symbol.
- Make sure the Library panel is open. Drag four instances of the navArrow symbol onto the Stage and align each of them to the right of the navigation labels (on top of the arrows visible from the Comp Image layer).
Note: You might want to use the Align panel to help align the arrows.
- Click outside the Stage to make sure no arrows are selected. Hold down the Shift key and click the HOME label and its arrow to select both of them.
- With both buttons selected, open the Modify menu, and click Convert to Symbol.
- Name the symbol Button Home and set the Behavior to Button. Click OK. The label and arrow are now one instance of the Button Home symbol.
- Repeat steps 3-5, selecting the other pairs of labels and arrows to create three more buttons named Button Artist, Button Events, and Button Visit.
- Save your work and remain in this screen for the next Step-by-Step.
Hot Tip:You might also want to try selecting all the buttons and ' then clicking Space evenly horizontally (do not select Align To Stage on the Align panel).
The buttons are now on the Stage. You will make them active in Lesson 6 when you create the pages to which they will link. First, however, you will put some of the layers into folders to clean up the Timeline.
Creating Layer Folders
Most designers organize their work in a Flash document by separating objects on different layers. Often this results in a lot of layers, making it difficult to see all the layers in the movie without collapsing the Stage. You might have noticed that your Timeline is getting long and difficult to see. In Flash you can have layer folders for storing several layers that hold similar content. You are going to create two folders to sort the layers by Filmstrip and Navigation. These folders will help later when you are dividing the content that changes from page to page and the content that remains static.
-
STEP-BY-STEP 5.6: Creating Layer Folders
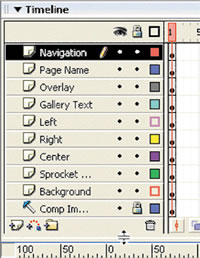
- Move your pointer over the dividing bar between the Stage and the Timeline. When the pointer turns into a two-headed arrow, drag the dividing bar down to display the complete list of layers, as shown in Figure 5-13.
Hot Tip: You can also drag on the divider bar between the layer area and the frames area of the Timeline to adjust the horizontal size of the layers area.
FIGURE 5-6a:
Dragging the Timeline divider to increase the Timeline area
- Continue to drag down to allow space for two more layer items you will be adding.
- Click the Insert Layer Folder button, located below the list of layers on the Timeline.
- Double-click the Folder 1 layer, rename the folder Filmstrip, and press Enter (Windows) or Return (Macintosh).
- Hold down Control (Windows) or Command (Macintosh) and select the following layers: Overlay, Gallery Text, Left, Right, Center, Sprocket Holes, Background, and Comp Image.
- Click and drag any one of the selected layers to move them all into the Filmstrip folder. All of the selected layers are moved.
Important:
Be sure you select all the layers to move together so you don't change the order of the layers (they are listed from highest to lowest in step 5).
- Click the Filmstrip folder and then click the Insert Layer Folder button to create another layer folder above the Filmstrip folder. Rename it Navigation.
- Drag the Page Name and Navigation layers into this Navigation folder.
- Click the arrows next to the folders to expand or collapse their contents. With the folders collapsed, you have a much narrower Timeline. You can increase the area for the Stage by dragging the dividing line between the Timeline and the Stage.
- Save your changes and remain in this screen for the next Step-by-Step.
Adding the Logo and Gallery Title Text
You've created and organized the filmstrip and navigation layers. Now it's time to finish the home page by creating the title and logo areas at the top of the page.
-
STEP-BY-STEP 5.7: Adding the Logo and Gallery Title Text
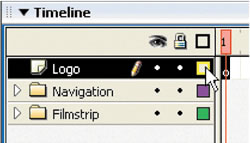
- Click in the Navigation layer folder and then click the Insert Layer button. Rename the new layer Logo.
- Open the File menu, point to Import, click Import to Library, and double-click your logo.swf file in the Images folder (the one you created earlier). The logo appears in the library as a graphic symbol.
- Click Show as Outline to the right of the Logo layer name, as shown in Figure 5-7a, and then select the Logo layer.
FIGURE 5-7a:
Using the Show as Outline button with the Logo layer Timeline
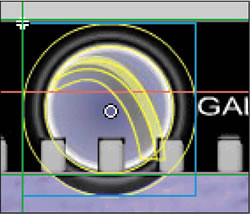
- Drag an instance of the logo graphic onto the Stage near the logo image visible from the Comp Image layer.
- Use the arrow keys to line up the arch outline of the logo graphic with the logo on the comp image, as shown in Figure 5-7b.
FIGURE 5-7b: Lining up the logo
- Select the Text tool and set the font to Arial or Helvetica, the size to 14, and the color to white.
- Next to the logo and in the same layer, insert a text box and key GALLERY SAN LUIS.
- Select SAN LUIS and change its font to Arial Black, 18. (If you don't have Arial Black, make it Helvetica bold.)
- Use the Selection tool to deselect SAN LUIS and to select the entire text box.
- Locate the Transform panel. If necessary, open the Window menu, and click Transform to open the Transform panel.
- Change the horizontal Width to 130%.
- Use the Selection tool or the arrow keys to align the gallery name over the name visible from the Comp Image layer.
- Use the Selection tool to select outside the Stage area. Select the Text tool and set the font to Arial or Helvetica and the size to 14.
- On the Stage, key 227 BOB ST SF CA (note the two spaces between ST and SF and between SF and CA). Create another text box and key 415.555.2342.
- Use the Selection tool and the Shift key to select both text boxes and then use the Transform panel to set the horizontal widths for the text boxes to 130%.
Note:
Depending upon the font used for your text, you might need to make further adjustments to the font size or properties. The text does not have to be an exact matchyou just want it to be close.
- Use the Selection tool and the arrow keys to align these two text boxes to the Comp Image layer.
- With the Logo layer selected, click on the Insert Layer button, and then rename the new layer Border.
Note:
Insert these text boxes toward the top of the Stage. You don't have to be precise. You will soon align them to the comp image.
- Select the Rectangle tool. Click in the gray area outside the Stage. On the Property inspector, set the stroke to white, the fill to none (the square with the red line through it), and the
line width to 1.5.
- Draw a rectangle around the entire Stage. Don't worry about making it a perfect shape.
- With the Selection tool, double-click the rectangle to select it. On the Property inspector, set the W dimension to 779, the H dimension to 437, the X dimension to 0, and the Y dimension to 0.
- With the rectangle still selected, open the Modify menu, and click Convert to Symbol.
- In the Convert to Symbol dialog box, name the symbol Page Border and set the Behavior to Graphic. Click OK.
- Open the Control menu, and click Test Movie to preview the document. You should see a white border showing the size of the final dimensions of your movie.
- Close the Preview window.
- To see what the site will look like in a Web browser, open the File menu, point to Publish Preview, and then click Default - (HTML) to open the movie in your browser. You might have to switch windows to see the HTML page.
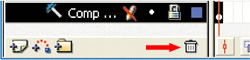
- If you are satisfied with the look of the project, close your browser, and then delete the Comp Image layer by making sure it's unlocked and dragging it into the Trash, as illustrated in Figure 5-7c.
FIGURE 5-7c: Deleting the Comp layer
- Save your work and then close the file and exit Flash.
 Back to previous page: Lesson 4: Creating a Home Page Back to previous page: Lesson 4: Creating a Home Page
 After this lesson, you should complete the following After this lesson, you should complete the following
- Test on Flash Lesson 5: Adding Text and Navigation
Go to next section: Lesson 6: Working with Movie Clips
|
