Lesson 3: Creating a Logo
Upon completion of this lesson, you should be able to:
- Create ovals and circles with the Oval tool
- Design gradient fills.
- Create and edit symbols.
- Import images into Flash.
- Export images from Flash.
The Gallery San Luis Project
You have been asked to create a logo for a local photo gallery, Gallery San Luis. The gallery said it might want to animate this logo, so you decide to build the logo in Macromedia Flash.
 Creating a Folder Structure Creating a Folder Structure
Before you start building the logo, you need to create a folder structure for the project.
-
STEP-BY-STEP 3.1 Creating Folders for a Web Site
- Create a new folder in your student folder and name it build_GallerySanLuis.
- From the data files supplied for this project, copy all the subfolders from the Macromedia Flash folder (images, photographs, Sample Movie, scripts, and video) into your build_GallerySanLuis folder.
Now you're ready to start building the logo in Flash.
Creating a Flash Document
A Flash file is referred to as a "document" and carries the .fla extension. A FLA file can form a basis for several other types of media you can produce from a Flash document (bitmap images, SWF files, and HTML files, among others).
-
STEP-BY-STEP 3.2 Saving a Flash Document
- Start Flash.
- With the blank document on the Stage, click the File menu, and then click Save. The Save As dialog box opens.
- Name the file logo followed by your last name. From the Save in (Windows) or Where (Macintosh) list box, select the images folder inside the build_GallerySanLuis folder. Make sure Flash is selected as the document type.
- Click Save. Remain in this screen for the next Step-by-Step.
Setting Document Properties
When you create any new document, you start by configuring its size, background color, and frame rate.
-
STEP-BY-STEP 3.3 Setting Document Properties
- Click the Modify menu, and then click Document. The Document Properties dialog box opens.
- Set the dimension to 100 x 100 pixels to create a space appropriate for the logo size.
- Leave the Background color white and click OK. The Stage size shrinks to 100 x 100 with a white background.
- Save your changes and remain in this screen for the next Step-by-Step.
Using Basic Drawing Tools
You need to consider two things in the design of the Gallery San Luis logo: The logo should look like a stylized lens, and it should include part of the Gateway Arch, the symbol of St. Louis from which the gallery took its name.
The Oval Tool
You will draw the lens part of the logo with the Oval tool and then add part of the arch on top of it, as shown in Figure 3-2.
FIGURE 3-2 Design of the logo
-
STEP-BY-STEP 3.4: Using the Oval Tool
- The logo.fla document should be open. On the View menu, point to Magnification, and then click Show Frame. The Stage enlarges to full size for its view area.
- Double-click the title of Layer 1 (on the Timeline panel) and rename it Lens. Press Enter (Windows) or Return (Macintosh).
- On the Timeline, click frame 1 of the Lens layer.
- Click the Oval tool in the toolbar.
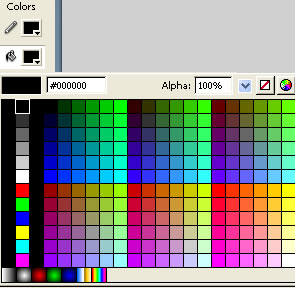
- In the toolbar, change the Stroke Color and Fill Color both to black (#000000), as shown in Figure 3-4a.
FIGURE 3-4a:
Stroke and Fill selections
- Hold down the Shift key and drag to draw a black circle in the center of the Stage. (Don't worry about exact size and placement; that will be set in the next steps.)
- Select the Selection tool and double-click the circle.
- In the Property inspector, set W: to 98 and H: to 98.
- Click the Align tab on the Align & Info & Transform panel. The Align panel expand.
- Toggle the To Stage button so it is on.
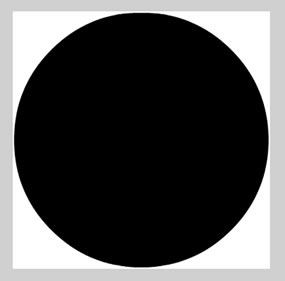
- Click Align horizontal center and Align vertical center (position the pointer on the buttons to display their TooITips if necessary). The circle aligns to the center of the Stage, as shown in Figure 3-4.
FIGURE 3-4: Circle for the logo
Hot Tip: Notice that there are two selection arrows in the toolbar. The black arrow is the Selection tool for selecting and moving an object. The white arrow is the Subseleetion tool for adjusting points on an object. In the following exercises you use the Selection tool. An easy mistake is to select only the fill of an object (the inside part). To avoid this, make sure you double-click to select an object.
- Save your changes and remain in this screen for the next Step-by-Step.
Gradient Fill
You now have the basis for the logo, but you can make it look more like a lens by adding a gradient fill. Gradient fills give depth and layered effects to a single object.
-
STEP-BY-STEP 3.5: Creating a Gradient Fill
- Select the Selection tool and double-click the black circle to make sure both the fill and the stroke are selected.
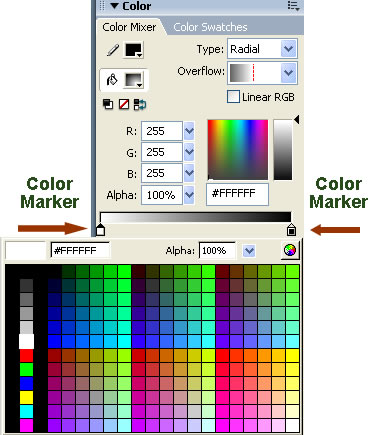
- Make sure the Color Mixer panel is expanded, and change the fill style from Solid to Radial. The Gradient definition bar appears, with a color marker on each end.
- Double-Click the left color marker of the Gradient definition bar and change the marker's color to white, as shown in Figure 3-5.
- Double-Click the right color marker of the Gradient definition bar and change its color to black, as shown in Figure 3-5a. The image displays a white gradient fill.
FIGURE 3-5a:
Changing gradient colors Transform
- Click the left (white) color marker and slide the Alpha of the left fill to 0%. The image appears completely black again. The image now has a transparent fill. To create the actual lens look, you have to add more color markers to the gradient fill.
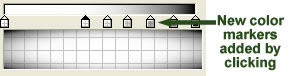
- Click five times under the Gradient definition bar to create five new color markers, as shown in Figure 3-5b. (Don't worry about the placement of the markers-these will be adjusted in later steps.)
FIGURE 3-5b:
Adding new color markers
- Change the color and alpha settings of the markers to the values shown in Table 3-1 (numbered from left to right).
TABLE 3-1:
Changing marker settings
MARKER |
1 |
2 |
3 |
4 |
5 |
6 |
7 |
| Color |
White |
White |
White |
Black |
Gray (#666666) |
Black |
Black |
| Alpha |
0% |
30% |
100% |
100% |
100% |
100% |
100% |
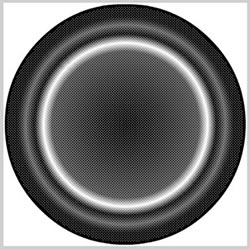
- Adjust the locations of the markers to the approximate locations shown in Figure 3-5c. With the markers set appropriately, the lens should look like Figure 3-5d.
FIGURE 3-5c:
Gradient markers in position
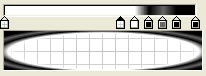
FIGURE 3-5d:
Gradient fill effect on the lens (shown with figure selected)
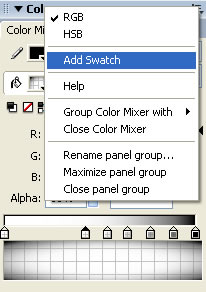
- To save the gradient fill for use later (even in other documents), click Color Mixer Options button in the upper-right corner of the Color Mixer and choose Add Swatch, as shown in Figure 3-5e. The gradient appears as a new color in the Color Swatches panel and in the document's color palette.
- Save your changes and remain in this screen for the next Step-by-Step.
FIGURE 3-5e:
Saving the gradient
Creating Symbols
When you are working in Flash, you'll often find yourself reusing objects you have created on the Stage. Each object you create increases the size of your final document. In Flash, a symbol is a graphic, button, or movie clip that you create once and can reuse throughout a document. Symbols present several advantages in Web design:
- Converting a drawn object into a symbol creates a permanent object from which you can make many other copies.
- Symbols can overlap on the Stage and not affect each other. To keep a drawn object from being erased when another object moves on top if it, you can turn the drawn object into a symbol.
- Keeps file sizes small because symbols can be reused without significantly increasing file size.
- Symbols contain their own Timelines to create many rich, interactive areas on a Web page.
- Changing one symbol affects all copies of that symbol and thus makes updating easy.
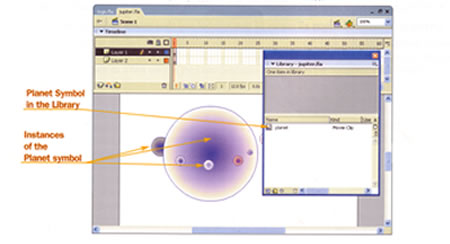
Any symbol you create automatically becomes part of the library for the current document. The library in a Flash document stores symbols created in Flash and also imported files such as video clips, sound clips, bitmaps, and imported vector artwork. When you select a symbol in a library and drag it onto the Stage, you create an instance of that symbol, as shown in Figure 3-6a.
FIGURE 3-6a:
Symbol and instance example

The great thing about symbols and instances is that you can change the size and color of instances without altering the original symbol, as shown in Figure 3-11. Flash also lets you change the behavior setting of an instance on the Stage or a symbol in the library at any time.
FIGURE 3-6b:
Variations of a single symbol as instances on the Stage
As mentioned previously, Flash has three different types of symbols: graphics, buttons, and movie clips. These types of symbols are discussed in more detail in the following sections. Understanding the differences in symbols is a key to working successfully in Flash.
Graphic Symbols
Graphic symbols are used for static images and simple animations. Graphic symbols operate in sync with the Timeline of the main movie. What does that mean? Each frame in a graphic symbol has to correspond to a frame on the main Timeline. If your main Timeline has 10 frames and your graphic clip has 15 frames, only the first 10 frames of the graphic clip will play. If your graphic clip has fewer frames than the main Timeline, the graphic clip will loop back to the beginning and play out as many frames as it can before the main Timeline runs out. Interactive controls and sounds won't work in a graphic symbol's animation sequence.
Movie Clips
Movie clips are more flexible than graphic symbols. They play independently of the main movie Timeline. In fact, a movie clip is like a movie within a movie. You can put actions, sounds, and buttons inside movie clips.
Button Symbols
Button symbols are used for creating buttons. The Timeline for a button is a little different from the regular Flash Timeline. A button has four states:
- The Up state is how the button appears on the screen when it first appears.
- The Over state becomes visible when you move your pointer over a button on the Stage.
- The Down state is revealed when you click a button.
- The Hit state is not visible in your document but defines the active area of a button. The active area can be larger or smaller than the visible button, and it can even have a different shape.
In creating the logo for Gallery San Luis, you will make a movie clip symbol containing graphic symbols.
-
STEP-BY-STEP 3.6: Creating a Movie Clip Symbol
- Select the Selection tool and double-click the gradient circle. The circle and its border are selected.
- Click the Modify menu, and then click Convert to Symbol. The Convert to Symbol dialog box opens, as shown in Figure 3-6c.
FIGURE 3-6c:
Convert to Symbol dialog box
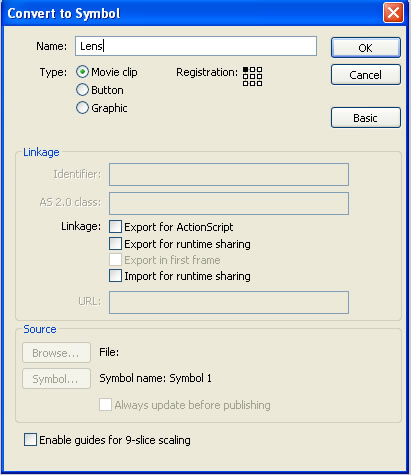
Note:
Figure 3-6c shows the Convert to Symbol dialog box with the Advanced options displayed. Your dialog box may open with only the Basic options displayed. To see the Advanced options, click the Advanced button. To close the Advanced options, click the Basic button.
- Enter Lens in the Name box.
- Select Movie clip as the Type. (You are making a movie clip symbol to allow for maximum functionality of the logo in animation and ActionScript. For example, it will be easy to make the logo a link to the home page.)
- Click OK. The circle has a blue box around it, indicating that the instance of the symbol is selected.
- Click the Library tag (if necessary) to see the symbol in the library.
- Save your changes and remain in this screen for the next Step-by-Step.
Importing Images
Importing images into Flash is a flexible process. You can import bitmap images, vector graphics, or published movies. In the next Step-by-Step, you import a published Flash movie (a document with a swf file extension). This document is the arch fill for the logo. When you import a Flash movie, the object is saved in the library, automatically creating a graphic symbol from the image.
-
STEP-BY-STEP 3.7: Importing a SWF Image into the Library
- Create a new layer by clicking the Insert Layer button in the bottom-left corner of the Timeline panel, as shown in Figure 3-7a.
FIGURE 3-7a: Insert Layer button
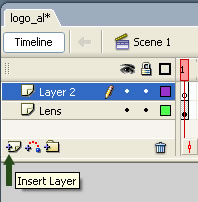
- Double-click the Layer 2 name and rename the layer Lens Fill. Press Enter (Windows) or Return (Macintosh).
- Click the File menu, point to Import, and then click Import to Library. The Import to Library dialog box opens.
- Navigate to the images folder in your build_GallerySanLuis folder, select arch.swf, and then click Open (Windows) or Import to Library (Macintosh). The file is imported to the library and the dialog box closes.
- To see the file you just imported, select the arch.swf title bar in the Library panel. The graphic symbol arch.swf appears in the library panel window.
- Make sure the Lens Fill layer is selected. Drag an instance of the arch.swf image from the library onto the Stage in the approximate center of the lens.
- With the arch.swf image still selected in the Lens Fill layer, click the Align panel title bar to expand the panel, if it is not already expanded.
- Make sure the To Stage button is toggled to on.
- Click the Align horizontal center and the Align vertical center buttons. Arch.swf is aligned to the center of the Stage.
- Drag the Lens Fill layer below the Lens layer next to the Timeline. The image moves behind the gradient lens on the Stage.
- Click the Control menu, and then click Test Movie. A preview of the file appears and a SWF file is generated.
- Close the Preview window.
- Save your changes and remain in this screen for the next Step-by-Step.
Exporting Flash Files
You now have a FLA file and a SWF file. You will now create a JPEG version of this file to send to the client. The JPEG image would be appropriate for a static HTML version of the site.
-
STEP-BY-STEP 3.8: Creating Images to Export from Flash
- On the File menu, point to Export, and then click Export Image. The Export Image dialog box opens.
- Name the file Logo followed by your initials and set its type (or format) to JPEG image (*.jpg).
- Click Save. The Export JPEG dialog box opens.
- Set the Include text box to Full Document Size. The dimension boxes should show 100 x 100 pixels. (Edit them if they do not.)
Note: You can create many types of images from a Flash file. JPEG is the best option for a Web logo with many color gradations.
- Set the Quality to 90.
- The Progressive display option should be unchecked.
- Click OK. A JPEG version of the logo is saved in the Images folder.
- Send a copy of the JPEG file to the teacher.
- Close your logo file and exit Flash.
 Back to previous page: Lesson 2: The Flash Workspace Back to previous page: Lesson 2: The Flash Workspace
 After this lesson, you should complete the following After this lesson, you should complete the following
Go to next section: Lesson 04: Designing a Home Page
|
