For this lesson, you will create a simple web site with a home page like the one shown in the illustration below: In the process of creating the page, you will learn many different ways to format text and customize the look of your page.
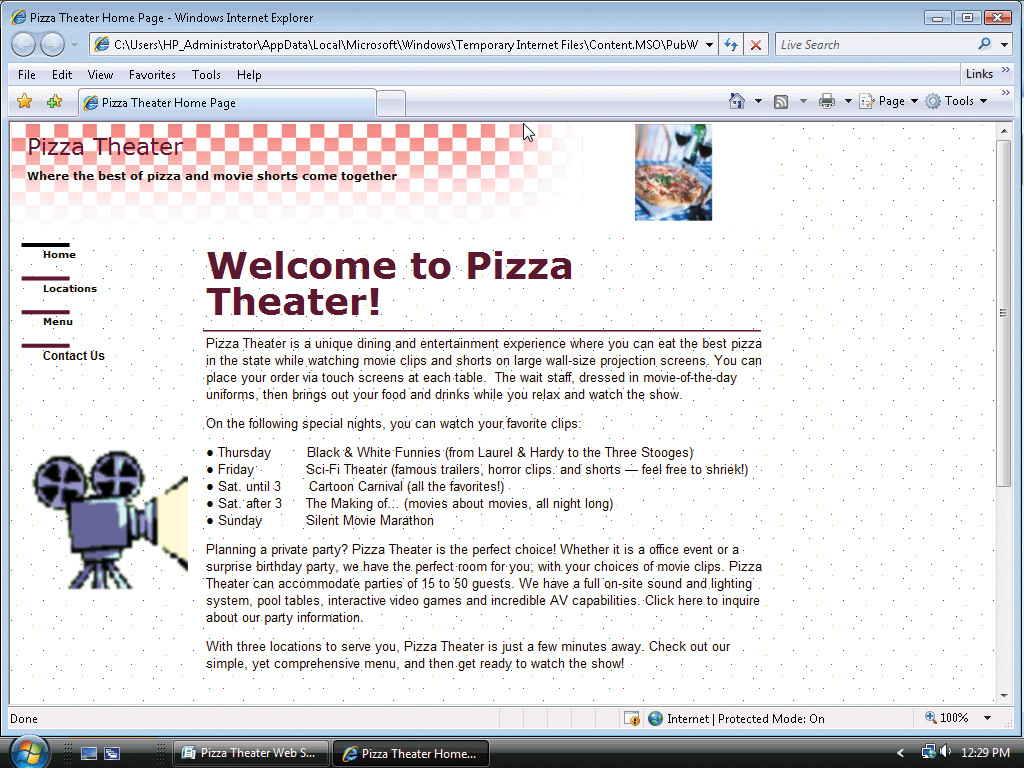
Click on image to view full size
Selecting Web Site Template Options
You will use a Web site template from the catalog, for the first three pages of the Web site. The following steps choose a template, a font scheme, a color scheme, and navigation bar options for the Web site.
-
Step-by-Step 1.1: Selecting Web Site Template Options
- Start Publisher.
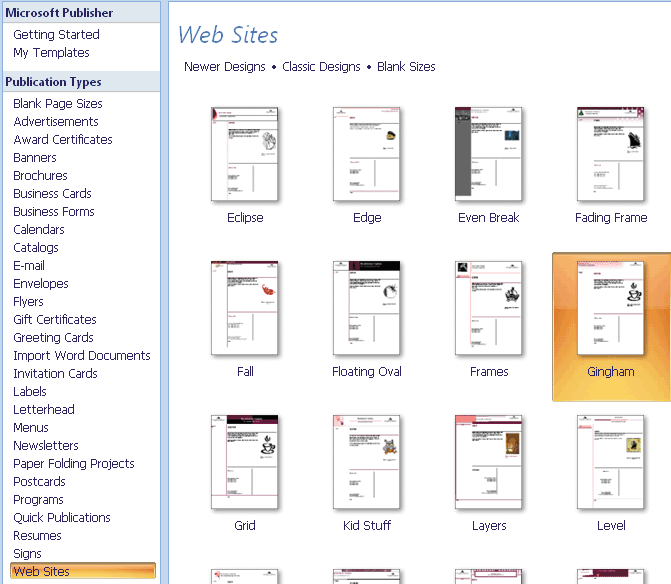
- With the catalog displayed, click the Web Sites button in the list of Publication Types to display the Web site templates.
- At the top of the catalog click Classic Designs, and then scroll as necessary to click the Gingham preview
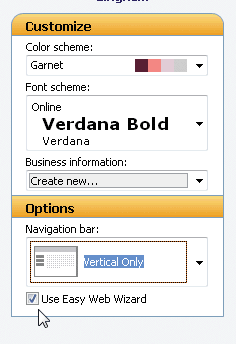
- In the Customize area, select the Garnet color scheme and the Online font scheme.
- In the Options area, click the Navigation bar box arrow and then click Vertical Only in the list to specify a vertical navigation bar
- If necessary, click the Use Easy Web Wizard check box so that it displays a check mark
- Click the Create button to display the Easy Web Site Builder dialog box
- Click so that check marks display only in the ‘Tell customers how to contact us’ and ‘Display a list of projects or activities’ check boxes
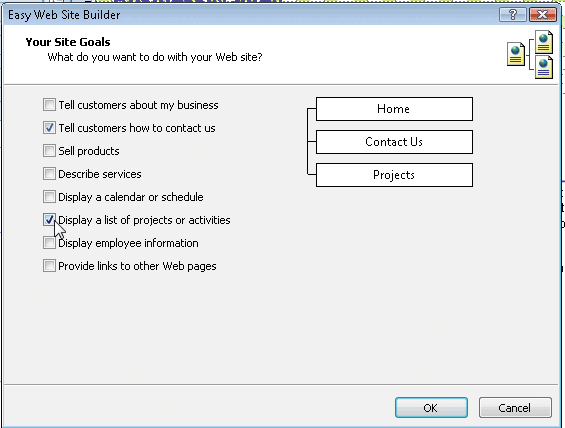
- Click the OK button to create the Web site with the selected secondary pages. A working box will display while the additional Web pages are created
- When the publication is displayed, close the task pane. If the Special Characters button on the Standard toolbar is not selected already, click it to display formatting marks on the screen. Your title bar may display a different publication number.
- If the Web Tools toolbar is displayed, click its Close button
Editing the Home Page
When using Publisher Web site templates, you must edit template objects and insert content specific to the business, purpose, or Web site owner. The home page is the first page that Web site visitors will see, so it should contain appropriate information in the masthead and navigation bar so that visitors can navigate the site and find key information.
In the steps that follow, you will edit the masthead and navigation bar that will repeat on all the pages in the Web site. You will also edit the heading and the main story, and insert a Design Gallery object unique to page 1 of the publication. Finally you will include both a static graphic and an animated graphic on the home page to help convey the Web site’s message and style.
-
Step-by-Step 1.2: Editing the Masthead and Heading
- Zoom to Page Width
- Select the text in the Business Name text box and then type Pizza Theater to replace the text
- Select the text in the tag line text box and then type Where the best of pizza and movie shorts come together to replace the text

- Select the word Home in the heading text box. Type Welcome to Pizza Theater! to replace the text
Editing the Navigation Bar
The navigation bar that comes with the Web site templates, and those inserted using the Design Gallery, are grouped objects. Navigation bars include hyperlinks to the other pages in the Web site, text to guide the Web site visitors, and graphical shapes unique to each template or Design Gallery object. You can change the components in a navigation bar by editing them individually or by using the Navigation Bar Properties dialog box. The page title, which displays in the browser bar title bar, also is edited via the Navigation Bar Properties dialog box. Because the navigation bar is a synchronized object, changing it on one page changes it on all pages.
-
Step-by-Step 1.3: Editing the Navigation Bar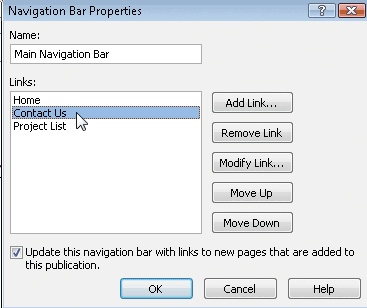
- Select the navigation bar, and then click the button below the navigation bar that displays a magic wand symbol to display the Navigation Bar Properties dialog box
- In the Links area, click Contact Us to select the link.
- Click the Modify Link button to display the Modify Link – Main Navigation Bar dialog box
- Select the text in the Text to display box, and then type Locations to replace the text.
- Click the Change Title button to display the Enter Text dialog box.
- Select, if necessary, the text in the Page title box and then type Pizza Theater Locations to replace the text.
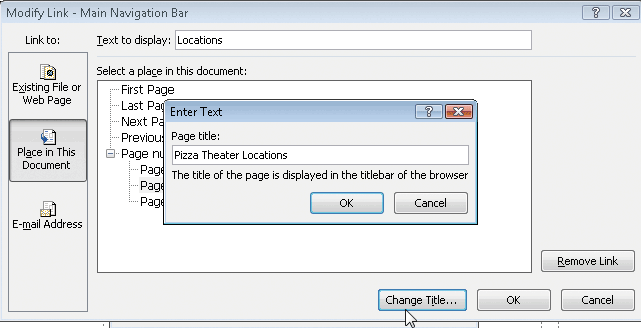
- Click the OK button to close the Enter Text dialog box.
- Click the OK button to close the Modify Link dialog box.
- In the Links area, select Project List and then click the Modify Link button.
- Select the text in the Text to display box, and then type Menu to change the navigation bar text.
- In the ‘Select a place in this document’ area, click Page 3. Project List to select it
- Click the Change Title button to display the Enter Text dialog box
- Select, if necessary, the text in the Page Title box and then type Pizza Theater Menu to change the page title.
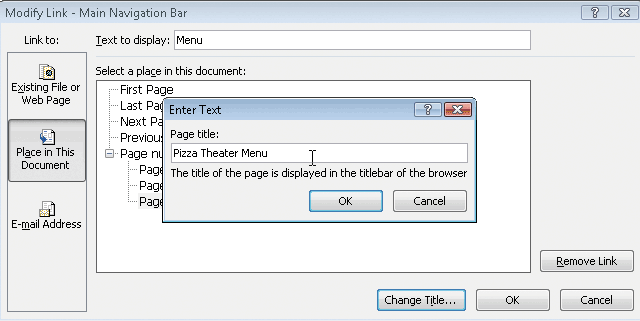
- Click the OK button to close the Enter Text dialog box
- Click the OK button to close the Modify Link dialog box
- Click the OK button to close the Navigation Bar Properties dialog box
-
Step-by-Step 1.4: Editing Other Objects on the Home Page 
- Delete the organization logo in the upper-right corner of the page
- Scroll as necessary, and then delete the Caption text box below the graphic of the coffee cup
- Move the coffee cup graphic to a location approximately 100 pixels below the navigation bar
- Select the main story text box. Double-click the status bar to reveal the Measurement toolbar. Change the width to 567 pixels. Change the height to 387 pixels
- Close the Measurement toolbar (Figure 6-13)
-
Step-by-Step 1.5: Importing the Main Story
With the main story text box resized, the following steps import the text for the story from a Word document.
- Right-click and Save Target the Pizza Theatre Text document and save it in your Web site folder.
- Right-click the default text in the main story text box to display the shortcut menu. Point to Change Text, and then click Text File to display the Insert Text dialog box
- Navigate to your Web folder and then double-click the file, Pizza Theater Text, to insert the text file. A Converting box will display while the text is being inserted.
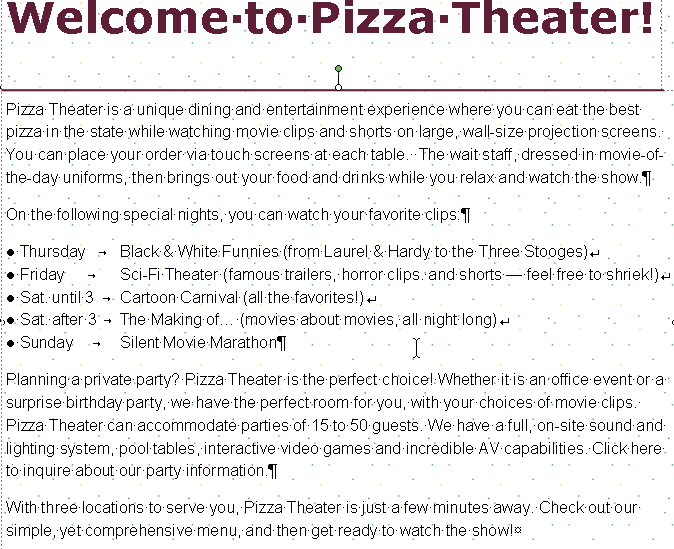
-
Step-by-Step 1.6: Editing the Contact Information 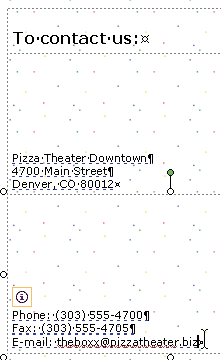
The following steps edit the contact information text box that repeat on all pages of the Web site:
- Scroll down to display the contact information text boxes
- Select the text in the address text box and then type Pizza Theater Downtown and press the ENTER key.
- Type 4700 Main Street and then press the ENTER key.
- Type Denver, CO 80012 to finish the address.
- Select the text in the phone/fax/e-mail text box and then type Phone: (303) 555-4700 and press the ENTER key.
- Type Fax: (303) 555-4705 and then press the ENTER key.
- Type E-mail: theboss@pizzatheater.biz to finish the address.
-
Step-by-Step 1.7: Inserting a Design Gallery Object
The following steps insert an object from the Design Gallery and edits its text to display the business hours of Pizza Theatre:
- On the Objects toolbar, click the Design Gallery Object button to display the Design Gallery window
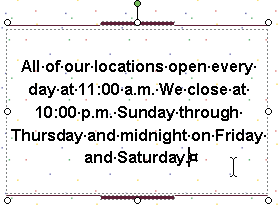
- In the list of objects on the left, click the Pull Quotes button, and then double-click the Punctuation pull quote to insert the Design Gallery object into the publication
- Drag the pull quote to a location right of the contact information. Resize the pull quote to approximately 220 x 137 pixels. Select the text and then type All of our locations open every day at 11:00 a.m. We close at 10:00 p.m. Sunday through Thursday and midnight on Friday and Saturday to replace the text.
- Stay in this same screen for the next Step-by-Step.
Bookmarks
A bookmark is a location in a publication that you name for reference purposes as you design a publication. Bookmarks display as small flags in page layout only. They do not print in print publications, and they do not display in browsers when visitors view a Web site. Bookmarks are saved, however, when the publication is saved.
Bookmarks are used to organize large or multi-page publications and to locate objects that you want to revise at a later time. Instead of scrolling through the publication to locate an object or text, a named bookmark allows you to go to it quickly, using the Bookmark dialog box.
Inserting a Bookmark
To create a Bookmark, you click the Bookmark button on the Objects toolbar. Publisher then displays a Bookmark dialog box in which you give the bookmark a name. Using the dialog box, you can add, delete, sort, or go to bookmarks. Once a bookmark is created, you can drag it to any location on the page.
In the following steps, you will create a bookmark next to the pull quote so that you can find it quickly later in the lesson.
-
Step-by-Step 1.8: Inserting a Bookmark 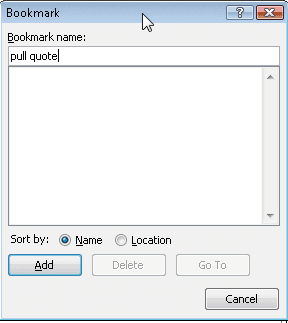
- Deselect the pull quote
- Click the Bookmark button on the Objects toolbar to display the Bookmark dialog box
- In the Bookmark name box, type pull quote to enter a name for the bookmark (Figure 6-17).
- Click the Add button to create the bookmark
- Drag the bookmark to a location
near the pull quote 
Web Graphics
When using graphics on Web pages, you must consider visual appeal, download time, resolution, and purpose. Unless the home page is a picture gallery, two or three graphics is enough to create visual appeal and catch the visitor’s attention.
Even though the computer screen is lower in resolution than most printed pages, Web graphics easily can rival the quality of color images printed on paper. Resolution refers to the number of horizontal and vertical pixels in a display device. A high resolution graphic makes a Web page more visually appealing, but increases the time to load the page in the browser.
Purpose may be the most important consideration in using Web graphics; they should help convey the Wweb site’s message, not clutter the layout. The graphics should add interest and color, brand a company, draw attention, show relationships, or simplify complex information.
Inserting an Animated Graphic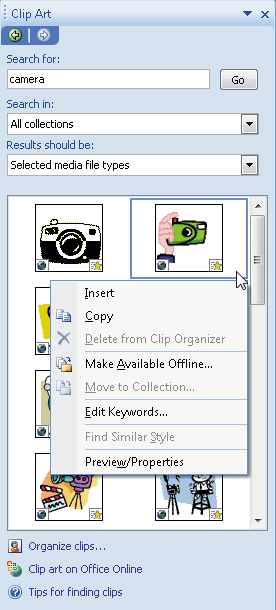
An animated graphic is a picture that displays animation when viewed in a Web browser. While too much animation may distract users, a subtle animation may convey the eb site owner’s message or style. The following steps preview an animated graphic:
-
Step-by-Step 1.9: Previewing an Animated Graphic
- Scroll to the upper portion of the home page. Double-click the coffee cup graphic to display the Clip Art task pane
- In the Clip Art task pane, type camera in the Search for box.
- Click the Search in box arrow, and then click the Everywhere check box so that it displays a check mark
- Click the Results should be box arrow, and then click the Movies check box so that it displays a check mark.
- Click to remove any other check marks.
- Click the Go button to perform the search.
- Click the button on any preview to display its menu
- Click Preview/Properties to display the Preview/ Properties dialog box.
- Click the Close button to close the Preview/Properties dialog box
Inserting a Graphic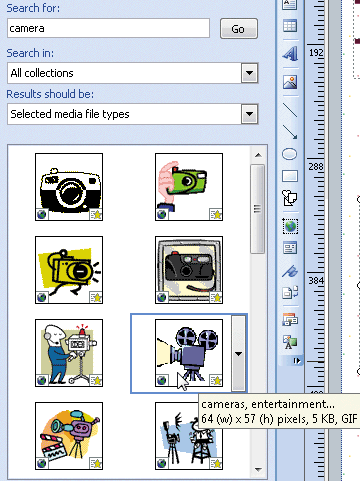
The following steps insert the animated graphic on the home page:
-
Step-by-Step 1.10: Inserting and Editing a Graphic
- In the Clip Art task pane, click a graphic similar to the one shown on the image to the left to insert it into the publication
- Close the Clip Art task pane
- Click Arrange on the menu bar, point to Rotate or Flip, and then click Flip Horizontal.

Using Empty Picture Frames
A static graphic does not display animation; the picture stays the same when viewed in a Web browser. In the following steps, you will first create an empty picture frame and then you will insert a static graphic that is a photograph of a pizza.Using an empty picture frame rather than inserting directly from the Clip Art task pane will size the desired graphic automatically.
-
Step-by-Step 11: Inserting Graphics Using an Empty Picture Frame
- Scroll to display the upper portion of the Web page
- On the Objects toolbar, click the Picture Frame button to display the Picture Frame menu

- Click the Empty Picture Frame command
- Drag to create an empty picture frame in the upper-right corner of the Web page.
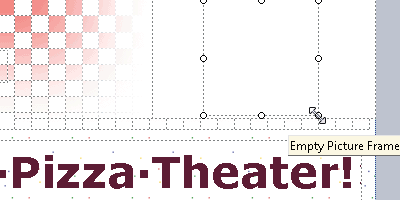
- Right-click the empty picture frame. On the shortcut menu, point to Change Picture, and then click Clip Art to display the Clip Art task pane
- Search for photographs of a pizza
- Select a graphic similar to the one shown in the figure on the right.

- Close the task pane
Alternative Text
A special consideration when using graphics on the Web is the issue of accessibility. Screen readers that read Web pages for people with disabilities can provide feedback about pictures, but only if the picture has alternative text. Alternative text is a written description of the image object that appearsas an alternative to a graphic image on a Web page. The Alt text is also displayed when a mouse is held over the graphic, as you can see in the image below:

Hold mouse over graphic
to view Alternative text
In the following steps, you will insert alternative text for the two graphics on the home page.
-
Step-by-Step 12: Adding Alternative Text
- Right-click the photograph of the pizza, and then click Format Picture on the shortcut menu. When the Format Picture dialog box is displayed, click the Web tab
- Type A picture of a pizza displays on a table at the Pizza Theater restaurant. in the Alternative text box .
- Click the OK button to close the dialog box
- Right-click the photograph of the camera, and then click Format Picture on the shortcut menu. When the Format Picture dialog box is displayed, click the Web tab
- Type An animated graphic displays a picture of a movie camera with rotating film reels and flashing projection. in the Alternative text box.
- Click the OK button to close the dialog box
Web Page Options
Publisher’s Web Page Options allow you to customize the way the Web page displays and how it works on the Web. You can edit the page title, the file name, search engine information, and the background sound. Recall that the page title is the text that will display in the browser’s title bar. The file name is the name of the individual Web page as it is stored on a server.
The search engine information, such as description and keywords, creates meta tags in Web publications; these are HTML specification tags that tell search engines what data to use. The description is a sentence or phrase that you create about your Web site. The description is displayed in most search engine results pages. The description should encourage people to click the link to your web site. The keywords are a list of words or phrases that search engines may use to locate your page.
The following steps edit Web page options for the Pizza Theater Web site:
-
Step-by-Step 13: Editing Web Page Options
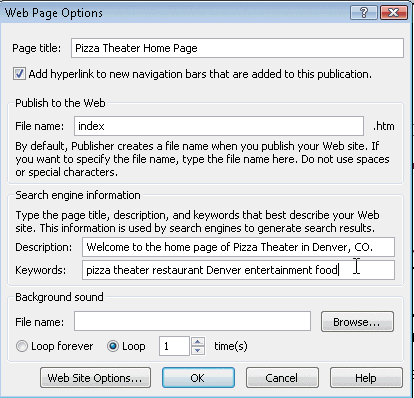
- Click Tools on the menu bar, and then click Web Page Options to display the Web Page Options dialog box
- Select any text in the Page title box if necessary, and then type Pizza Theater Home Page to replace the text
- Select any text in the File name box if necessary, and then type index to replace the text
- In the Description box, type Welcome to the home page of Pizza Theater in Denver, CO. to describe the Web site
- In the Keywords box, type pizza theater restaurant Denver entertainment food to create the keywords list
Background Sound
When you add a background sound to a Web publication, the sound plays when you view the page in a browser. The following steps insert a background sound from the sound files loaded with the initial installation of Publisher.
-
Step-by-Step 13: Inserting a Background Sound
- With the Web Page Options dialog box still displayed, click the Browse button to display the Background Sound dialog box
- If necessary, navigate to the location of sound clip art on your system.
- Double-click the SHOW_01.MID file or other sound file on your system.
- Click the OK button to close the Web Page Options dialog box.

Saving the Web Publication
With the home page complete it is a good time to save the publication, as shown in the following steps.
-
Step-by-Step 14: Saving the Web Publication
- To save on the hard drive: Click the Save button on the Standard toolbar, browse to your desired location,
Type Pizza Theater Web Site in the File name box to change the file name. Press the ENTER key
Note: you have not yet published any of your work as web pages, yet.
Making Changes on Page 2 of the Web Site
The next steps make changes on the Locations page for the Pizza Theater Web site. After editing the objects, you will then go to a bookmark and copy and paste the pull quote. Finally, you will name the file using the Web Page Options dialog box.
-
Step-by-Step 15: Editing Objects on Page 2
- Navigate to page 2. Individually, select the objects in Table 6–1 and edit them as directed in the table
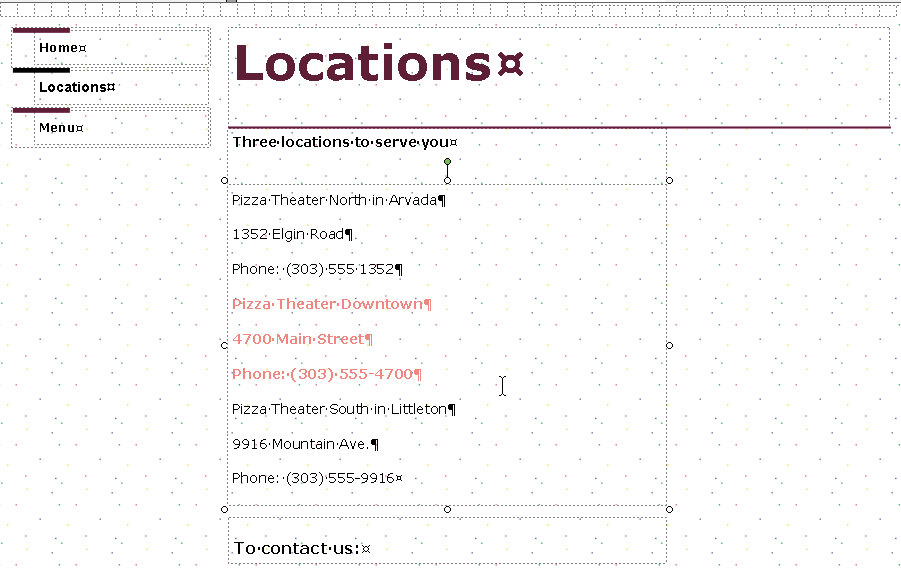
- In the Heading text box, select the words "Contact Us," and type Locations to replace it.
- In the Sub-heading text box, select the words "Heading" and replace it by typing Three locations to serve you:
- In the Sub-heading text box, select all the words and replace by typing:
Pizza Theater North
1352 Elgin Road
Phone: (303) 555-1352
Pizza Theater Downtown
4700 Main Street
Phone (303) 555-4700
Pizza Theater South in Littleton
9916 Mountain Ave.
Phone (303) 555-9916
- In the Main Story text box, select the middle three lines of text, representing the address of the downtown location.
- On the Formatting toolbar, click the Bold button.
- Click the Font Color button, and then click Accent 2 in the list.
- Deselect the text to view the color.
Click on image to see full size
-
Step-by-Step 16: Copying objects from Page 1 using a Bookmark
- On the Objects toolbar, click the Bookmark button to display the Bookmark dialog box.
- If necessary, select the pull quote bookmark and then click the Go To button
- Close the Bookmark dialog box by clicking the Close button in the title bar
- Right-click the pull quote, and then click Copy on the shortcut menu
- Navigate back to page 2, right-click an empty portion of the page layout, and then click Paste on the shortcut menu
- Resize the pull quote as necessary
-
Step-by-Step 17: Naming the Web Page File
- Click Web Page Options on the Tools menu to display the Web Page Options dialog box
- In the File name box, type locations to name the file
- Click the OK button to close the dialog box
Making Changes on Page 3 of the Web Site
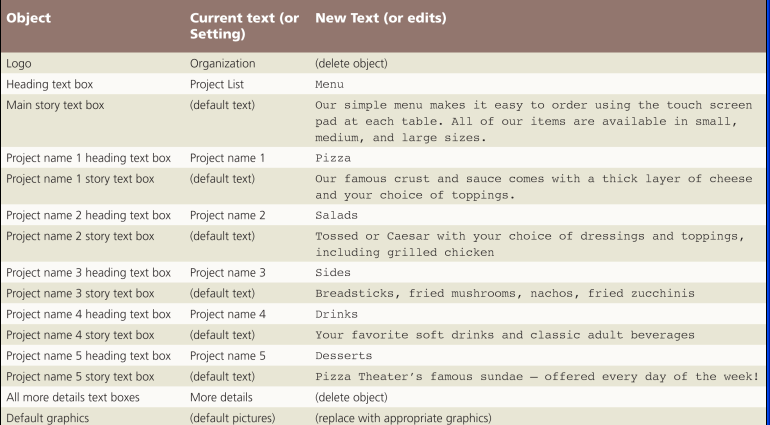
The next steps make changes on the Menu page of the template for the Pizza Theater Web site. Table 6-2 displays each object to be edited, the current text or setting, and the new text or required edits. You will name the file using the Web Page Options dialog box.
-
Step-by-Step 18: Editing Objects on Page 3
- Navigate to page 3
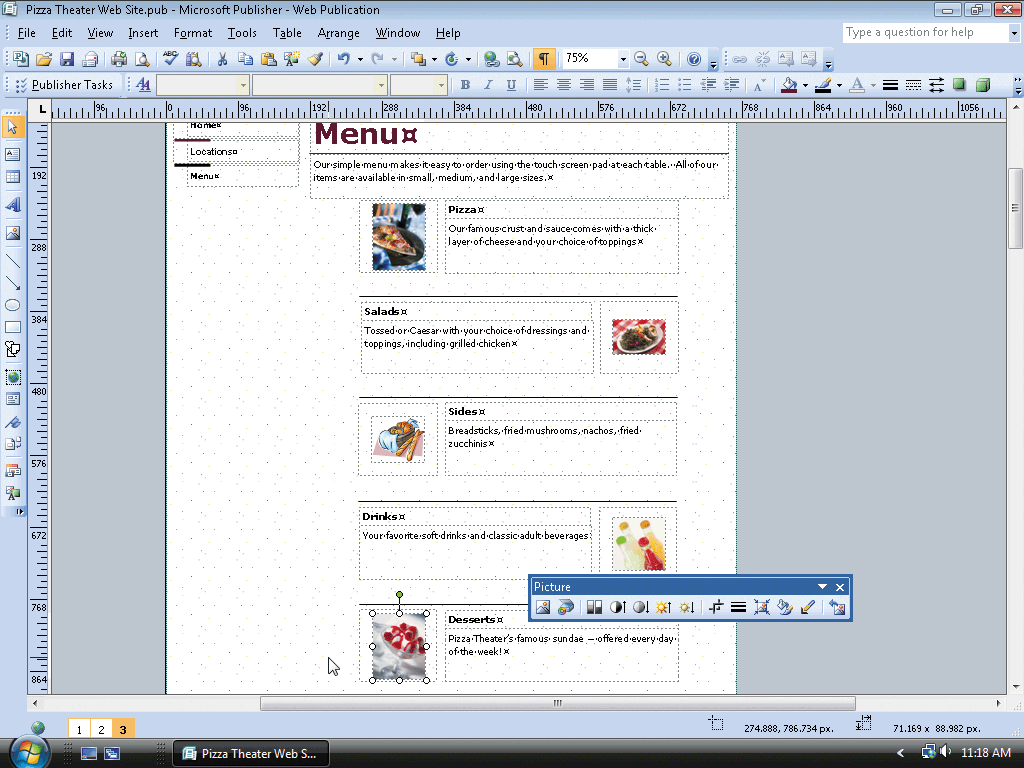
- Individually, select the text-based objects listed in Table 6–2 and edit them as directed in the table
- For each of the graphics, use the Clip Art task pane to find appropriate graphics to match the text
- To add alternative text to each graphic individually, right-click the graphic, and then click Format Picture. On the
- Web tab, enter an appropriate, short description.
Cliick on image to view full-sized
-
Step-by-Step 19: Name the Web Page File for Page 3
- Click Web Page Options on the Tools menu to display the Web Page Options dialog box
- In the File name box, type menu to name the file
- Click the OK button to close the dialog box
Saving the Heading and Main Story in the Content Library
Because you will want to use a heading and main story on a new page later in the chapter, the following steps store the objects in the Content Library.
-
Step-by-Step 20: Using the Content Library
- Click the border of the heading text box that displays the text, Menu, in order to select the text box. Shift-click to add the decorative line below the heading to the selection. Shift-click to add the main story text box below the decorative line to the selection
- Right-click the selected objects and then click Group on the shortcut menu to group the objects
- Right-click the selection to display the shortcut menu. Click the Add to Content Library command to add the selected objects to the Content Library
- Click the OK button to close the Add Item to Content Library dialog box
- Close the Content Library task pane
- Click the Save button on the Standard toolbar to save the publication again with the same name
Creating a Web Page From Scratch
Pizza Theater would like a Web page created from scratch, which means beginning with a blank page rather than a Web page template. The Wweb page should contain a way for customers to provide contact information and party preferences to Pizza Theater.
The following steps insert a new page:
-
Step-by-Step 21: Creating a New Page in the Web Publication
- Right-click the Page 3 icon in the page sorter to display the shortcut menu.
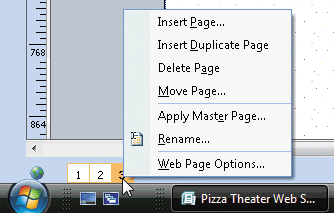
- Click Insert Page on the shortcut menu to display the Insert Web Page dialog box
- In the ‘Select a page type’ area, click Blank to select it (Figure 6-37).
- Click the OK button to display the new page. Your logo may differ.
- Zoom to page width.
- Delete the logo in the upper-right corner of the Web page
- With no other object selected on the page, click the ‘Item from Content Library’ button on the Objects toolbar to display the Content Library task pane
- In the Content Library area, double-click the previous stored, grouped object in the list
- In the publication, drag the grouped object to a location right of the navigation bar
- Close the task pane
- Double-click the text, Menu. Type Request More Information to replace the text
Select the text in the main story heading and then type If you would like to reserve a party room or receive more information from Pizza Theater, please complete the fields below and then click the Submit button. to replace the text
- In the masthead, select the text in the Business Name text box and then type Pizza Theater to replace the text. Select the text in the tag line text box and then type Where the best of pizza and movie shorts come together to replace the text
- In the navigation bar, double-click the word, Blank, and then type Contact Us to replace the text. If necessary, select the text and change the font to Verdana and the font size to 7.7 to match the other navigation bar text boxes (Figure 6-39).
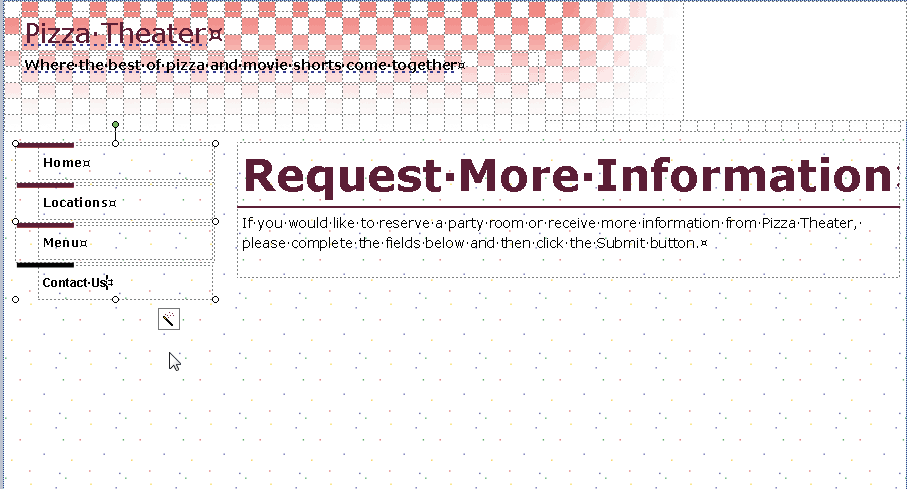
Click on image to view full-sized
-
Step-by-Step 22: Renaming the New Page
- To display the Web Page Options dialog box, click Web Page Options on the Tools menu
- In the Page title box, type Contact Us to title the page
- In the File name box, type contact to name the file
- Click the OK button to close the Web Page Options dialog box
This completes the first Web Design with Publisher lesson.

