Assignment 3 - Adding Links
Upon completion of this unit, you should be able to:
HTML's power comes from its capability to link regions of text and images to other documents. The browser highlights these regions (usually with color or underlines) to indicate that they are hypertext links. They are often called hyperlinks, or simply links. A link in HTML has two parts: the name of the file (or URL of the file) to which you want to link and the text or graphic that serves as the clickable link on the page. When the user clicks the link, the browser uses the path of the link to jump to the linked document. In some browsers, the path of the link is displayed in the status area of the browser window (the lower-left part of the window) when the pointer is positioned over the link.
In the next set of Step-by-Step exercises, you create text and graphics links on a Web page, add hotspots to an image to make it an image map, and link to named anchors within a page.
Creating Hypertext Links
Hypertext links can "jump" the user to another document within the current Web site or to a page at another Web site. The following Step-by-Step shows techniques for linking to a document within the site or for creating an external link.
-
Step-by-Step 3.1: Creating Links to a Document and to an External Site
- Save the following to your compass-tours folder. Be sure to save as File Type > "Web Page (HTML only.)"
- index.htm
- biking.htm
- diving.htm
- map.htm
- rafting.htm
- surfing.htm
- trips.htm
- Save the following images to your Images folder:
- aussie_xtreme.gif
- boy_surfer.jpg
- compass_logo_gray.gif
- diver2.jpg
- downhill.jpg
- featured.gif
- popular.gif
- rafting.jpg
- tri_top.gif
- worldmap.gif
- Start Macromedia Dreamweaver. From your compass_tours folder, double-click the index.htm file to open it. This file contains all the text and granhics vou will need to create links.
- In the Document window, find the unordered list under Featured Trips. In the first item of the list, select (highlight) the word Surfing.
- In the Property inspector, click the folder icon to the right of the Link text box. The Select File dialog box opens in the compass _tours folder.
- Select the surfing.htm file, and then click OK (Windows) or Choose (Macintosh). The filename surfing.htm appears in the Link text box.
- Save the file and preview it in your browser. Close the browser.
- Repeat steps 2 through 4 to link the word Diving to the diving.htm file, the words Mountain Biking to the biking.htm file, and the word Rafting to the rafting.htm file.
- Save the file and preview it in your browser. Close the browser.
- In the Document window, select the graphic at the bottom of the page.
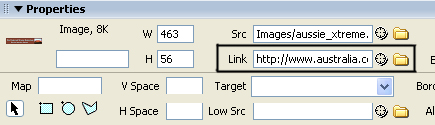
- In the Property inspector, key http://www.australia.com in the Link text box, as shown in Figure 3-1. You must key the complete URL, including http://.
FIGURE 3-1: The Property inspector, showing a URL link
- Save the file and preview it in your browser
- Close the browser and remain in this screen for the next Step-by-Step.
Note: If the URL is long or complex, you can go to that site in your browser, select the URL in the browser's address field, and copy and paste the URL into the text box.
Displaying Linked Content in a New Browser Window
When you link to a page, the linked page replaces the current browser page by default. Sometimes, however, you might want to display the browser page in a new location or window. For example, if you link to a site outside your site, you have just led your users out of your pages. If they haven't bookmarked your URL, users might not remember how to return to your pages. If your outside links open a new browser window, your page remains in the original window.
-
Step-By-Step 3.2 - Targeting a Link
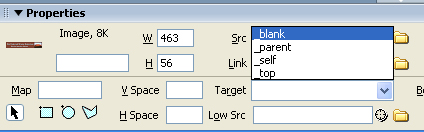
- With the bottom graphic still selected, click the arrow on the Target box in the Property inspector and choose _blank, as shown in Figure 3-2.
FIGURE 3-2: The Property inspector's Target pop-up menu
- Save the file and preview it in your browser. When you click the bottom graphic, the resulting page opens in a new browser window.
- Close the browser and the index.htm document. Leave Dreamweaver open for the next Step-by-Step.
In Dreamweaver, you can easily change the location where the linked page is displayed by using the following targets. (Targets other than blank work only when you create frames for your page.)
- _blank: Loads the linked document in a new, unnamed browser window.
- _parent: Loads the linked document in the parent frameset or window of the frame that contains the link. If the frame containing the link is not nested, the linked document is loaded into the full browser window.
- _self: Loads the linked document in the same frame or window as the link. This target is implied, so you usually don't have to specify it.
- _top: Loads the linked document in the full -top: window, thereby removing all frames.
Note: Use caution when opening new browser windows. New windows impose extra RAM requirements on the user's computer as each window is opened.
Creating Image Maps
You've experienced how easy it is to link an image to a page. The user can click anywhere on the image to go to that linked page. You can also divide an image into several links by using an image map to place individual hotspots on the image.
-
Step-By-Step 3.3 - Creating an Image Map
- Make sure the Files panel is open (click Locate in Site on the site menu if necessary). Inside the compass_tours folder, double-click on the map.htm file to open it. This file has a large map graphic that needs to be divided into three hotspots.
- Select the map graphic.
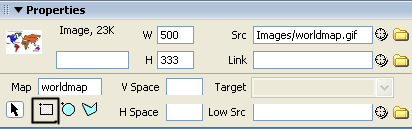
- In the Property inspector, key worldmap in the Map text box, as shown in Figure 3-3. (If you don't see the Map text box, click the expander arrow at the bottom right of the inspector.) Don't use spaces or special characters in the name. You can have several image maps on a page, but each map name must be unique: Remain in this screen for the next Step-by-Step.
FIGURE 3-3: The Property inspector 's Map text box

Hotspots can be in a variety of shapes. In the following Step-by-Step, you add a rectangular hotspot, a circular hotspot, and a polygonal hotspot to an image.
- Step-By-Step 3.4 - Creating Hotspots
- In the Property inspector, select the Rectangular Hotspot tool (refer to Figure 3-4a, below).
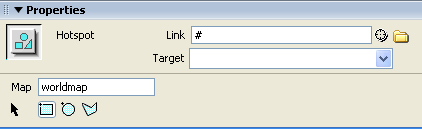
- Drag around the words Hawaiian Islands. A translucent blue-green area with handles appears around the text. The Property inspector changes to show hotspot properties, as shown in Figure 3-4b.
FIGURE 3-4b - The hotspot Property inspector
- In the hotspot Property inspector, select the Pointer Hotspot tool (below the work "Map" in Figure 3-4b, above). To resize the hotspot, drag a handle until the hotspot encompasses the small dot representing the Hawaiian Islands. To move the hotspot, position the pointer inside the hotspot and drag. (The hotspot must be contained within the boundaries of the image.)
- Make sure the rectangular hotspot is selected. In the hotspot Property inspector, key Hawaiian Islands in the Alt text box. This text serves the same purposes as image Alt text.
- Click the folder icon next to the Link text box and select trips.htm.
- Save the file and preview it in your browser. Close the browser.
- Select the large map graphic.
- In the Property inspector, select the Oval Hotspot tool. (to the right of the Rectangular Hotspot tool highlighted in Figure 4-3a above.)
- Drag a circle around Australia, including the words Australia & South Pacific. The hotspot area appears, and the Property inspector changes to show hotspot properties.
- Make the following changes:
- In the Alt text box, key Australia & South Pacific.
- In the Link text box, key http://www.australia.com. Make sure you delete the number sign (#) from this text box.
- From the Target pop-up menu, choose _blank to open a new browser window.
- Save your file and preview it in the browser. Close the browser.
- Select the large map graphic.
- In the Property inspector, select the Polygon Hotspot tool. (to the right of the Oval Hotspot tool in Figure 4-3a above.)
- To draw a polygon, click around the North America graphic. Each click creates a point. Each subsequent point is connected by a line to the previous point. Continue clicking around North America until you have the shape you want. Adding points might make the hotspot seem to disappear at first. As you click, you'll see the translucent hotspot area begin to form.
Note: The more points that make up a hotspot shape, the more slowly the page will be processed. Simplify hotspot shapes as much as possible.
- Make sure the polygonal hotspot is selected. In the Alt text box of the hotspot Property inspector, key North America.
- Use the folder icon next to the Link text box to locate and select trips.htm.
- Save your file and preview it in the browser.
- Close the browser and close the map.htm file. Leave Dreamweaver open for the next Step-by-Step.
Note: To delete a hotspot, select the graphic that contains the hotspot. Using the Pointer tool, select the hotspot. Click the Edit menu and then click Clear, or press Delete.
Linking to Named Anchors
When a document is long or has many sections, you might want to create a link that jumps the user to a specific place in the document. This eliminates the tedium of scrolling through the document. To do this, you must create a jump-to point-a named anchor-that you can reference as the link.
The following Step-by-Step illustrates the use of named anchors and the links to jump to them.
-
Step-By-Step 3.5 - Inserting Linking Anchor
- Open trips.htm. This file contains a large amount of text that requires scrolling to see the entire document.
- Position the insertion point before the heading Hawaii - Multisport at the bottom of the document. Make sure you haven't positioned the insertion point in the top navigation area.
- From the Common category of the Insert bar, click Named Anchor. Or you can click the Insert menu and then click Named Anchor to insert a named anchor. The Named Anchor dialog box opens, as shown below in Figure 3-5.
FIGURE 3-5: The Named Anchor dialog box
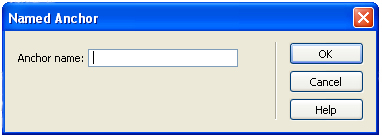
- Key hawaii in the Anchor Name text box and then click OK. Don't use spaces or special characters in the name. A yellow anchor icon appears on the page to represent the anchor. (If you can't see the icon, make sure Invisible Elements is turned on by clicking the View menu, pointing to Visual Aids, and then clicking Invisible Elements.)
- Scroll to the top of the trips.htm document. Select the text Hawaii - Multisport.
- In the Link text box of the Property inspector, key #hawaii. Then press Enter (Windows) or Return (Macintosh). You must key the number sign (#) before the anchor name in the Link text box. Make sure the name you key is exactly the same as the anchor name. Anchor names are case-sensitive.
- Save the file and preview it in your browser.
- Close the browser and remain in this screen for the next Step-by-Step.
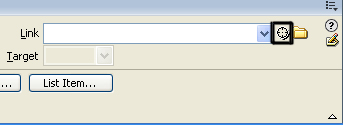
One of many areas where HTML is case-sensitive is in the naming of your anchors. If you name your anchor top, for example, and then enter #Top in the Link text box, your link might not work consistently in all browsers. To avoid keyboarding errors, you can use the Point to File icon in the Property inspector, as shown in Figure 3-6.
FIGURE 3-6: The Point to File icon in the Property inspector
-
Step-By-Step 3.6 - Linking by Using the Point to File Icon
- Add another named anchor before the Alaska Vacations heading and name the anchor alaska.
- Select the words Alaska Vacations at the top of the document.
- Drag the Point to File icon and point to the Alaska anchor you just created. Releasel the mouse button when you are directly over the, anchor. The link is made.
- Using the Point to File icon or the Link field in the Property inspector, insert anchors and links for the remaining headings.
- Save your file and preview it in the browser.
- Close the browser, and close the document.
-
Step-By-Step 3.7 - Linking to another Page's Anchor
- Open the map.htm file and preview in the broswer. Click on the Hawaii hotspot. Notice that the link opens to the top of the page. You just created a named anchor to the Hawaii section in the trips.htm file. You can make the image map point directly to the Hawaii section instead of linking to the top of the page.
- Close the browser.
- Return to the map.htm page and drag the Point to File icon to the Hawaii anchor on the trips.htm page. (make sure you can see both documents). When you release the mouse button, you'll see trips.htm#hawaii in the Link field.
- Save your file and preview it in the browser.
Additional Lesson Practice: Before moving on to the next lesson or project, complete the following to practice what you've learned so far:
- In the last paragraph of default.htm, link the phrase popular trips to trips.htm.
- At the end of the last paragraph of index.htm, add the sentence Our interactive map lets you traverse the globe. Use the Property inspector to make sure the formatting of the new text matches the formatting of the old text.
- Link the word map to map.htm.
- Insert the following sentence below the Flash movie at the bottom of index.htm: E-mail us for more information. Link the word E-mail to the address info@compasstours.com.
- On the diving.htm page add a link to the travel_log.htm page you made in Lesson 2. Be sure to include a descriptive sentence or two to describe what is on the page.
- Check to make sure that the Flash button on the bottom of the travel_log page links back to the Home page (default.htm).
- Use your Assets panel to easily add this Home button to the bottom of every page of the web site..
Congratulations! This completes Assignment 3: Adventure Tours
|
