Introduction to Adobe Dreamweaver
There are 2 main windows you will work
from in Dreamweaver: the editor and the site window.
- Use the editor to make new
HTML pages, and to edit existing HTML pages
- Use the site window to ftp
your files, manage your site (i.e., rename files, move
files, delete files)
The Editor:
Dreamweaver lets you edit a Web
page both visually (WYSIWYG) and by editing the actual HTML
code. You will frequently need to adjust the code that Dreamweaver
writes, because you are smarter than Dreamweaver and it
doesn't always understand what you want to do.
Every time you move a table, change
the font size and change it back again, Dreamweaver adjusts
the HTML
code. Lots of times this code will be messy and it's up
to you to fix it.
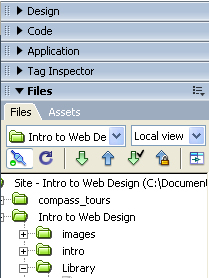
The Expanable Panels:
1. Panel Menu: On the right side of the Dreamweaver screen, there are panels that let you edit
the way your text displays, make links, insert images, create
tables, view the HTML source code, etc. These are found
by going to Window and selecting Files, Assets, Tag Inspector, Application, Code, etc. Alternatively you can click on the Name of the panel to expand or collapse the panel
2. Insert Bar : Below the standard menu items are a variety of preselected insert shortcut buttons. You can select from
8 different menus of insert buttons, by clicking on the arrow next to the "Common" name.. The "Common"
insert bar holds the most common objects. Click the corresponding
icon to insert a link, email link, anchor, table, image, Flash component, date, comment, template, or HTML tag.

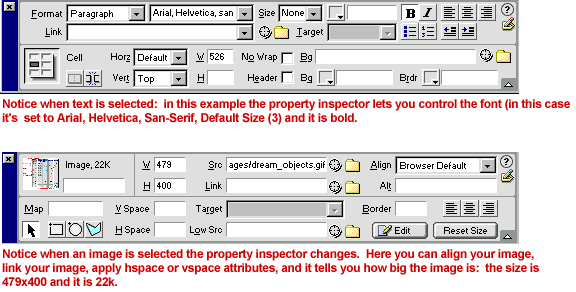
3. The Property Inspector: At the bottom of the Dreaweaver screen is the Property Inspector. This menu
lets you format text, link to other HTML pages, make lists,
and align things. NOTE: Depending on what you selected on
your page, the property inspector will change.
To learn how to use Macromedia Dreamweaver, complete Lesson 1, which will take you step-by-step through the creation of a sample commercial web page.
|
